Printer Install Instruction Sheet
Windows XP Edition
PLEASE USE AN ETHERNET CORD FOR ALL PRINTER INSTALLATIONS. DO NOT USE WIRELESS.
STEP 1: Getting the driver.
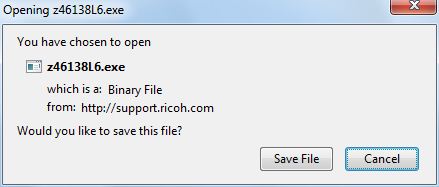
1. Click Here(or Here for 64 bit users) to get your driver. You should see a window that looks like:
(Note that this may look different in different web browsers, e.g. Firefox or Internet Explorer, etc.)
2. Click the Save File button. Save the file to your desktop for ease of use. When the file is finished downloading, double click the file on your desktop or in the downloads list. You may have this box pop up:
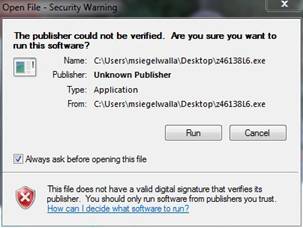
If so click the Run button.
3. The file will open in one of a few different extracting programs, however the dialog box should look very similar to:
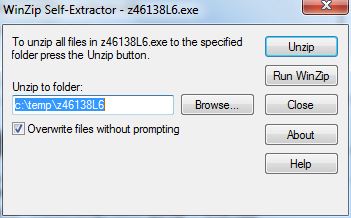
4. Notice that the folder is listed as C:\temp\z46138L6. Remember the folder C:\temp\z46138L6\32bit or \64bit for 64bit users. You have completed step one.
STEP 2: Installing the printer.
Note that this can ONLY be done after the new printer has been delivered and set up. Make sure you have fully completed step one before attempting.
1. First click the Start icon on the bottom left-hand corner of the screen, and then click Printers and Faxes. Click the Add a Printer button:
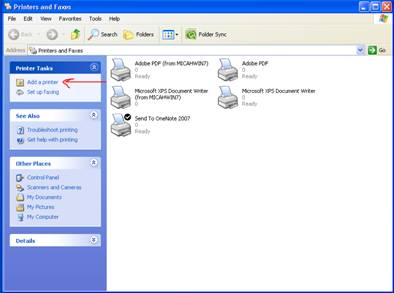
If you do not see Add a printer, click file in the upper left, and then click Add a Printer.
2. Click Next, and then select Add a Local Printer (I know you may be tempted to add a network printer but that is not how this is set up). I recommend un-checking the box that says automatically detect and install my Plug and Play printer, since this will only slow you down.
3. Select Create a new Port and in the drop down menu select Standard TCP/IP Port:
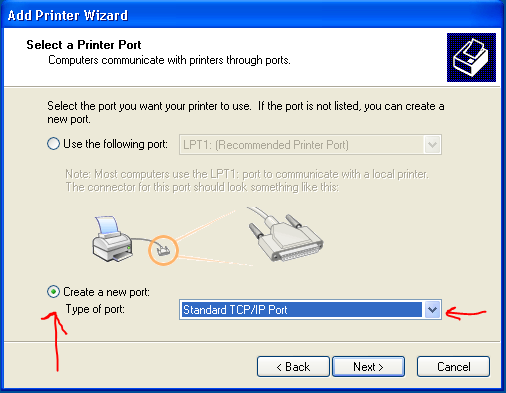
Click the next button.
4. Now for the first of two tough steps. You have to locate the name of your printer. This page should give you which printer name to use. Look through the table to find your department and location of printer. Then copy the entry in theHost Name of Printer column. Copy the printer name exactly as listed. For example if you are in the Math department you need to type Math-mfp.math.wesleyan.edu. If you have done this step correctly you should get a window with a finish button in the bottom right. When clicked it should bring you to this window:
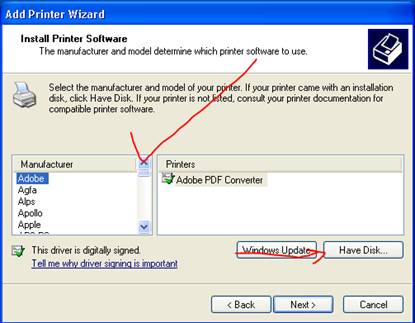
Now select Have Disk
If you got this window instead:
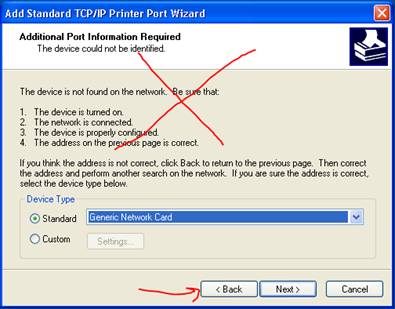
Click the back button and try typing in the name again. If you still are having issues first check with other users in your department to see if they are having similar issues, then check with your DSS to make sure that the name is correct.
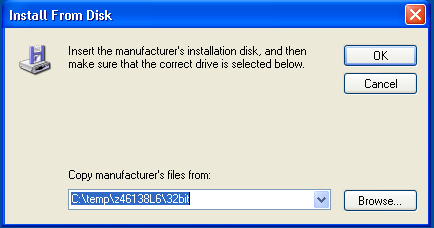
5. Now the second tough part, navigating to the folder. Remember
C:\temp\z46138L6\32bit? If you didn't that's fine, I had to look it up myself. Copy and paste that line into the window like so:
6. The last few steps are fairly straightforward. Click the OK button and then select PCL 6 Driver for Universal Print and click the Next button.
7. Name your printer, be sure to mention if it is black and white or color. If you have other Ricoh printers that you may be printing to, be sure to mention where the printer is.
8. The printer driver will then install, make sure not to share the printer when asked.
9. It is your choice whether to make the printer default or not. Congratulations you have completed step 2.
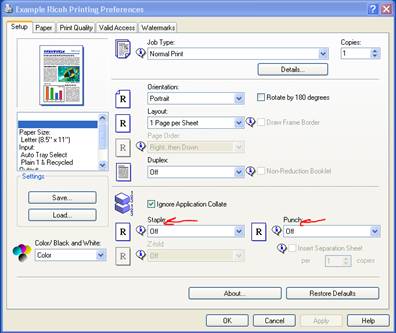
Final Step (Advanced Users only): Accessories, User codes, and Trays oh my.
THIS IS A MUST FOR ALL DEPARTMENTS USING USER CODE RESTRICTIONS FOR PRINTING.
If you have never had to type in a number to print a document skip this step. Similarly, if you would like to utilize stapling, hole punching, or any of the other advanced features you will also need to do the last step.
1. Go back in to the devices and printers window where you went for in the first step of step 2. Right click on the printer you just installed and click properties. You will see a little window informing you the printer is updating your options. When it is finished you should be able to configure any extra options your printer allows you. You can also get to the same screen by going to the printer properties menu in your favorite program to print from (e.g. Microsoft Word).
2. To enable user code prints click on the valid access option and type in your User Code (WesID) in the User Code box. You may have to do this every time you print in color, although certain programs (Microsoft Word for example) will automatically fill in this box for you after your first successful print.